Using the Favorites Menu in QuickBooks Desktop
QuickBooks® has a neat feature called Favorites Menu that lets you personalize the way QuickBooks® Desktop works for you. I don’t see a lot of people using it and I think that’s because it’s not very obvious that this feature even exists. So, I thought I’d create a short tutorial and share it here.
What Is The Favorites Menu?
The Favorites Menu is a feature that can be added to the QuickBooks® menu bar to allow for easy access to your favorite items or the tasks you perform most often. Think of it as a “shortcut” that helps you perform up to 30 different QuickBooks® tasks very efficiently.
How Can I Create My Own Favorites Menu?
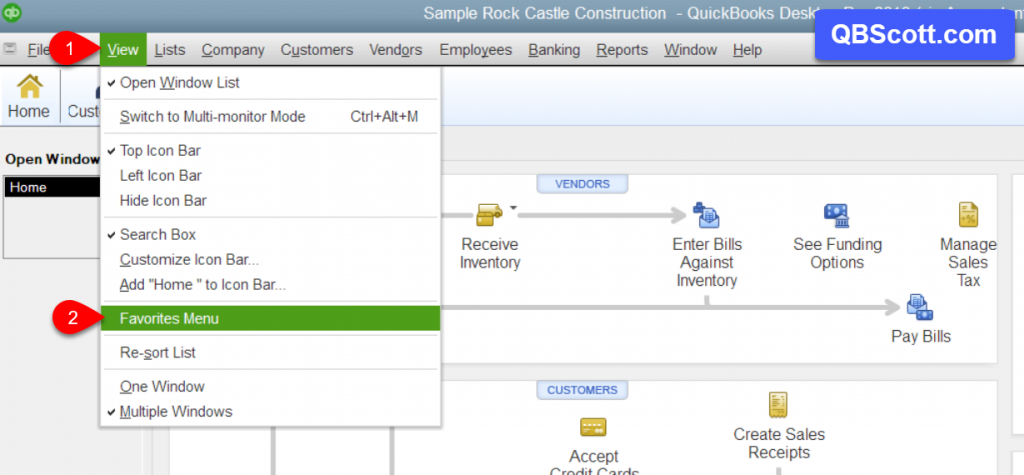
To add the Favorites Menu to the menu bar:
(1) Click View in the menu bar
(2) Click Favorites Menu
Once you do this, “Favorites” will appear in the menu bar.
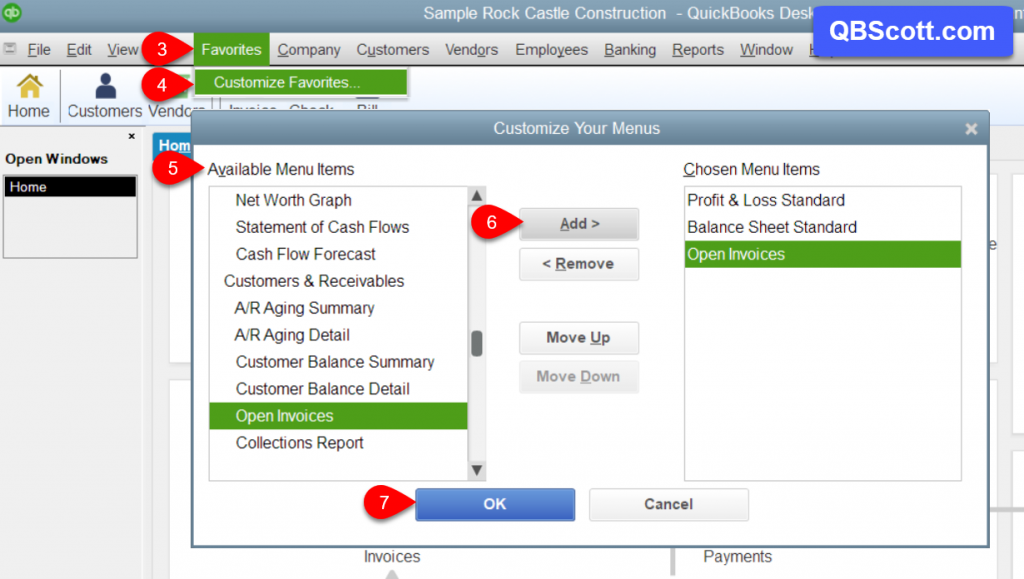
To add items to the Favorites Menu:
(3) Click Favorites in the menu bar
(4) Click Customize Favorites to bring up the Customize Your Menus window
(5) Select the menu item you want to appear in your Favorites Menu
(6) Click the Add button
Repeat steps 5 and 6 for each menu item you wish to add.
(7) Click the OK button when you’re done adding menu items.
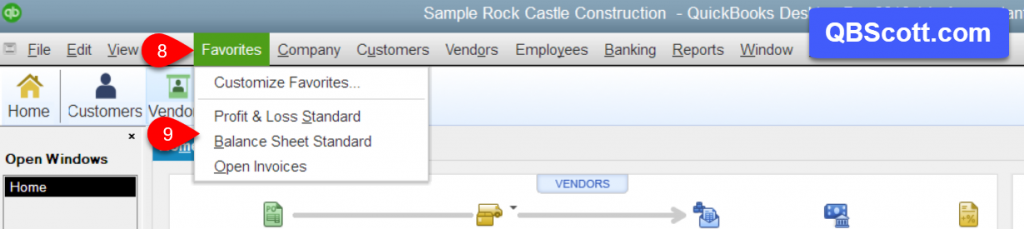
To see the new items that have been added to your Favorites Menu:
(8) Click Favorites on your QuickBooks® Menu Bar
(9) The list of items will appear in a dropdown menu as in Screenshot 4 below.
Click on the screenshots below for a larger view.
How To Modify Your Favorites Menu
After using your Favorites Menu for a while, you might decide you’d like to change it. Perhaps there are other items you’d like to have readily available. Or maybe you’d like to see menu items in a different order. Or you might decide you want to remove an item from the menu altogether.
No problem! Let me show you how to:
Add More Items
Once created, you can add more items to your Favorites Menu at any time (as long as you don’t exceed 30 menu items) by following steps 1 through 7 above.
Rearrange Items
You might prefer the items on the list to be in a different order… like the order in which you perform the tasks.
For example, you’re likely to make deposits and then want to see your Accounts Payable Aging report to see if there are any bills that are past due or ones that need to be paid immediately. So it would be convenient to have the Make Deposits feature at the top of your Favorites Menu, followed by the A/P Aging report.
Or, it may be more helpful to see the most frequently performed tasks at the top of the menu. For example, if your business sells products on a daily basis, you may be making deposits at the close of business each day. And, because your business is transactional, you want to ensure that QuickBooks® Desktop is updated with the latest information from your bank. So, in this case, you’d want Make Deposits at the top of your Favorites Menu, followed by Import Web Connect File.
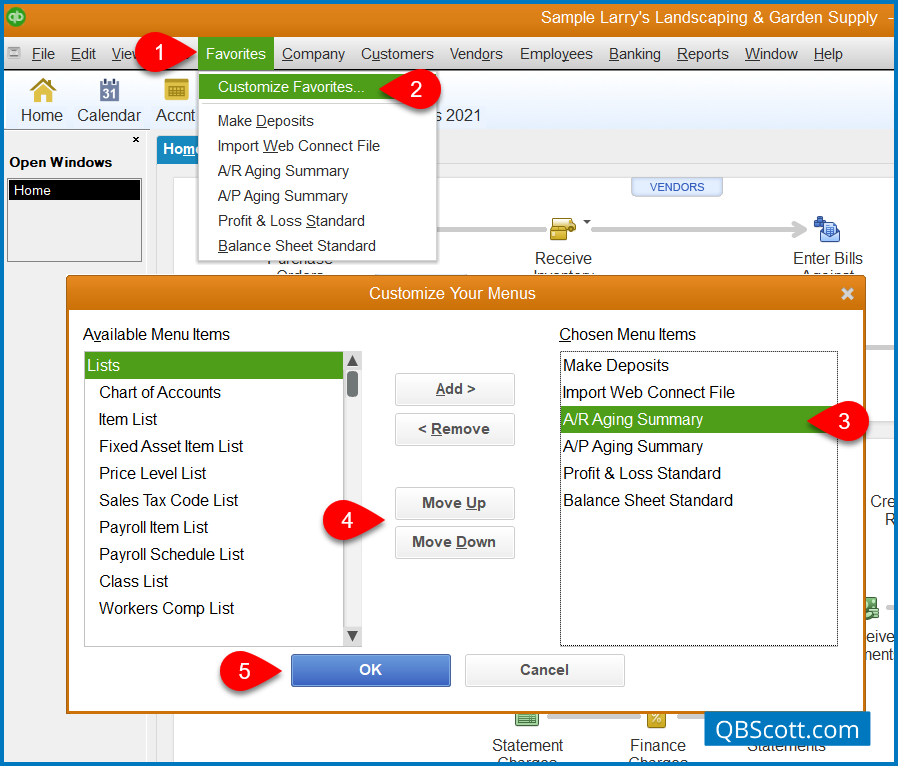
To rearrange the items listed on your Favorites Menu:
(1) Click Favorites on the QuickBooks® menu bar
(2) Select Customize Favorites
(3) Select the menu item you want to move in the Choose Menu Items box at the right of the Customize Your Menus window
(4) Click the Move Up or Move Down button until the menu item is where you want it to appear in the list
Repeat steps 3 and 4 until your Favorites Menu is arranged the way you would like.(5) Click OK when you’re done arranging your Favorites Menu.
Remove Items
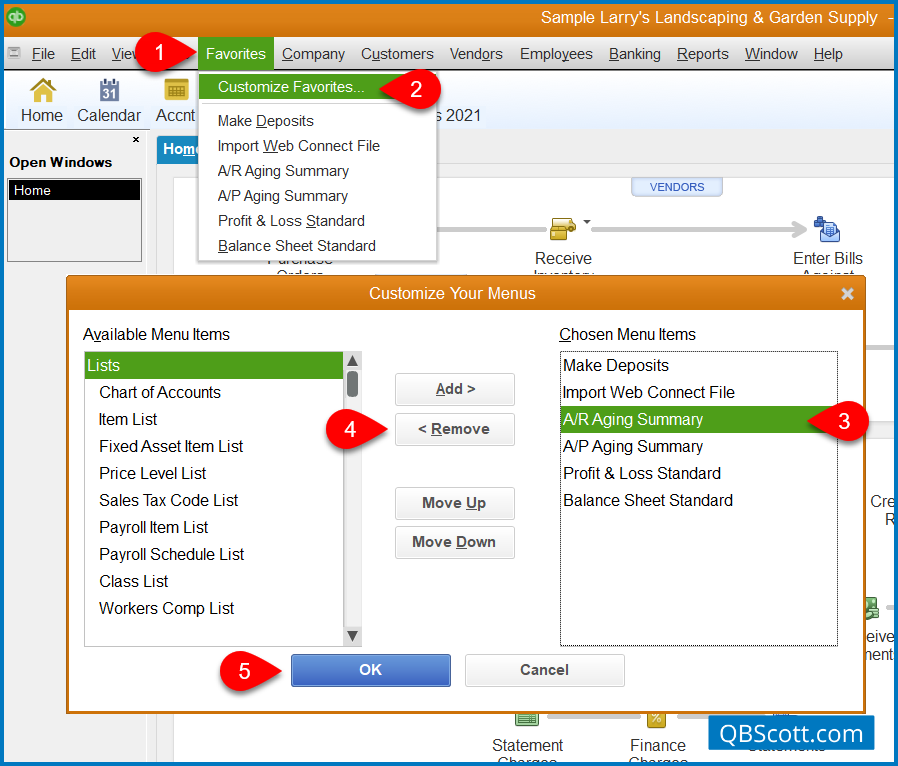
If you decide there are certain items you don’t want to see on your Favorites Menu any more:
(1) Click Favorites on the QuickBooks® menu bar
(2) Select Customize Favorites
(3) Select the menu item you want to remove from your Favorites Menu in the Choose Menu Items box at the right of the Customize Your Menus window
(4) Click the Remove button
Repeat steps 3 and 4 until all desired items are removed from the list.
(5) Click OK when you’re finished.
Now your favorite features and the tasks you perform most often are all in one, easy-to-access place.
Hope this helps!
Scott
More information like this can be found in my courses here.
Need help with your QuickBooks®? I can help you! Click here for more info.