QuickBooks® Check Printing – How to Align Pre-Printed Checks in QuickBooks Desktop
Updated January 6, 2021
When planning to print checks in QuickBooks® Desktop, there are a few things you’ll want to know like…
Where to Order Business Checks
Searching online to find a reputable source for business checks with fraud-prevention security features that will work with QuickBooks® Desktop can be overwhelming. So you’ll be happy to know that business checks and supplies are available from Compuchecks. I’ve used them for years for QuickBooks® Desktop and QuickBooks® Online. They have a generous return policy and are much cheaper than purchasing from Intuit. I highly recommend them.
A variety of options are available, but the three most popular are:
Voucher Checks
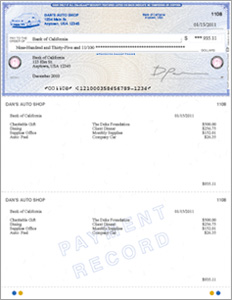
Voucher checks have one check and two check stubs per page, as in the image above.
Standard Checks (3 per page)
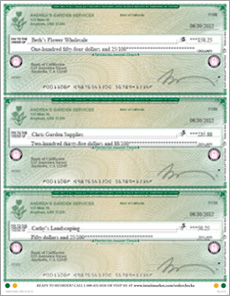
Standard checks have three checks per page and no check stubs.
Wallet Checks
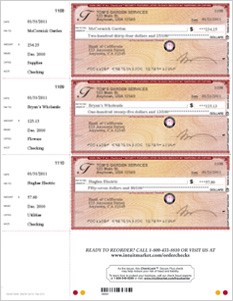
Wallet checks have 3 “wallet-size” checks, that are the same size as your personal checks, and a small check stub for each wallet-size check.
While each of these check styles can be useful, I’ve found that it is more difficult to align the Standard and Wallet checks when printing checks in QuickBooks® Desktop.
That’s one of the reasons why I prefer to use the Voucher checks.
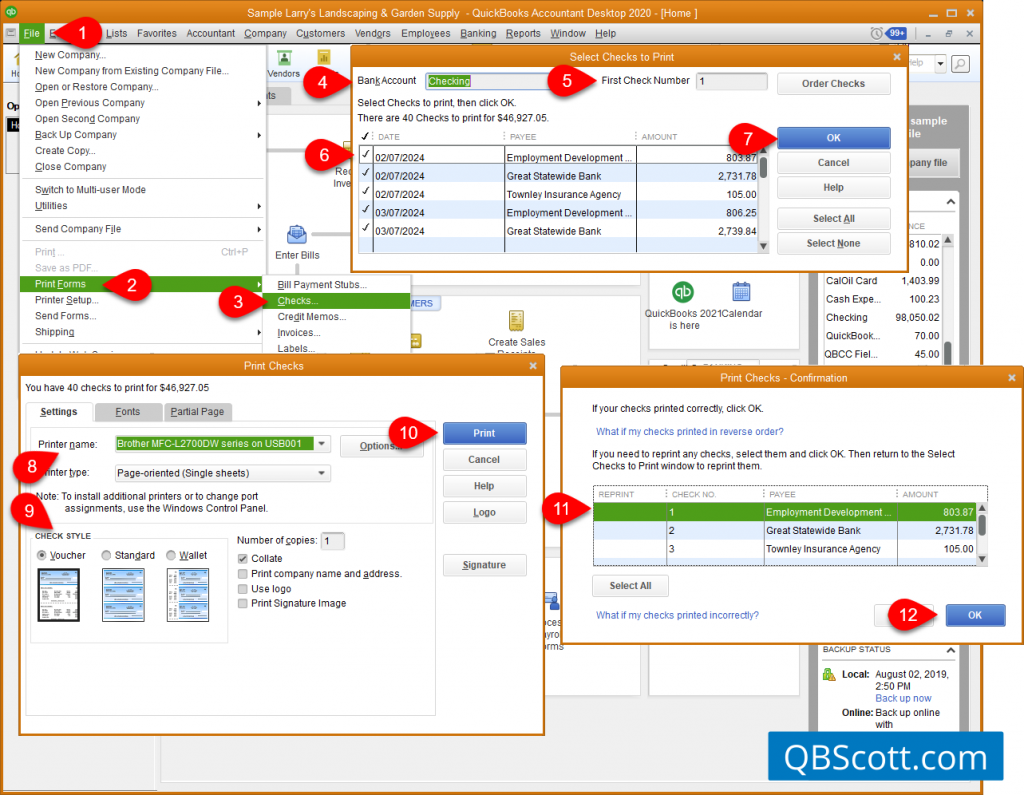
How to Print Checks in QuickBooks® Desktop
You have the option to print checks one at a time or in batches with QuickBooks® Desktop. And since I’m all about efficiency, here are the steps to print multiple checks in one batch.
- Click on File in the menu bar
- Select Print Forms
- Select Checks
- Select the appropriate Bank Account
- Enter the Check Number you want to begin with
- Select the checks you want to print
- Click OK
- Select your Printer
- Select the Check Style
- Click the Print button & review the checks to make sure they printed correctly
- Check the Reprint check box next to any check that did not print correctly. This allows you to reprint the check if needed. If all checks printed correctly, leave the Reprint column blank.
- Click OK
Click on the screenshot below for a larger view.
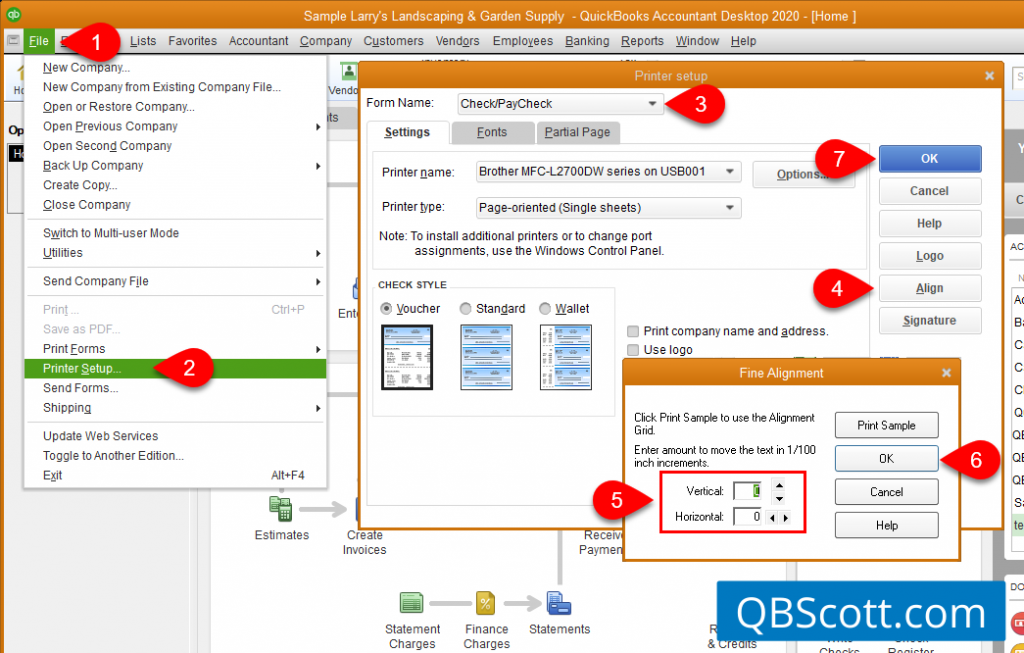
Printing Doesn’t Always Align Properly
When printing checks in QuickBooks, you may sometimes find that content doesn’t print where you want it to print. For example, maybe the dollar amount prints too high or too low on the pre‑ printed check stock.
I typically notice this when the printer needs to be serviced or when using a new printer that’s not been used to print checks. Regardless, QuickBooks has a simple way that you can fix this issue.
From the menu bar:
- Click File
- Click Printer Setup
- Select Checks/PayChecks from the Form Name dropdown
- Click the Align button
- Make adjustments to the Vertical and Horizontal alignment
- Click the OK button in the Fine Alignment window
- Click the OK button in the Printer Setup window
Going forward, these adjustments will already be in place, so you won’t have to repeat this process unless your checks are misaligned.
Click on the screenshot below for a larger view.
Why won’t my checks print in Quickbooks?
If you’re having trouble getting your checks to print, Quickbooks offers this guide to troubleshooting printing problems.
Hope this helps!
Scott
More information like this can be found in my courses here.
Need help with your QuickBooks? I can help you! Click here for more info.