How to Create a Sales Receipt in QuickBooks Desktop
If you’ve ever received a payment at the time of a sale (instead of invoicing the customer), you’ll want to create a sales receipt. In QuickBooks this is a fairly simple process.
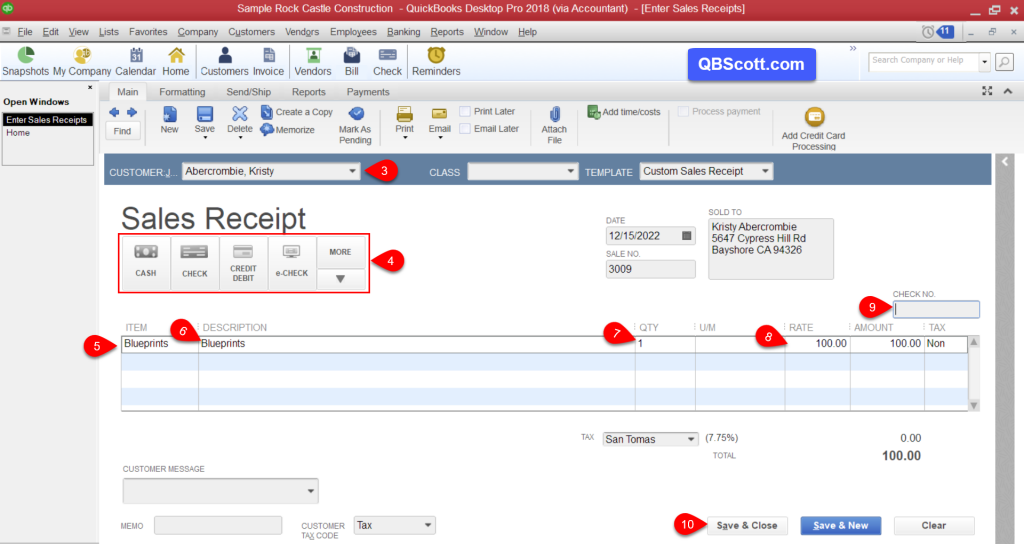
From the menu bar click Customer (1) and click Enter Sales Receipt (2). Once the Sales Receipt displays, select the appropriate Customer: Job (3) from the Customer: Job dropdown, select the payment method (4), select the item from the ITEM dropdown (5), add a description in the DESCRIPTION field (6), add the quantity in the QTY field (7), add the rate in the RATE field (8), if applicable add the check number in the CHECK NO. field (9), and once complete click the Save & Close button (10).
Click on the screenshot below for a larger view.

Hope this helps!
Scott
More information like this can be found in my courses here.
Need help with your QuickBooks? I can help you! Click here for more info.